In this article
You create a survey based on a template.
Click + NEW SURVEY.
The Select Template page opens, with a list of the survey templates available to you.
Select the template you wish to use.
Give your new the survey a logical name so that you can easily recognize it in the survey list. You can also add some notes about the survey (optional), for example a description of why you are running the survey.
Click "Create" to create the survey and go to the "Customize" step.
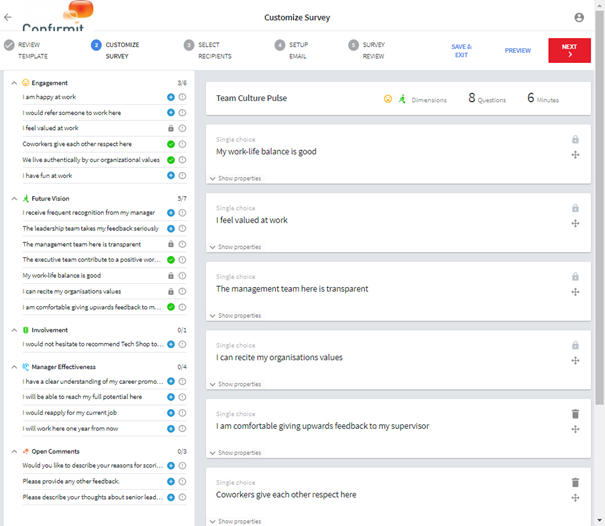
Figure 1 - Example of the Customize Survey pageIn the Customize step you can review the individual questions that are included in the survey, and all the other questions that are available to you from the survey library. The questions are grouped under dimensions, and for each dimension is given the number of questions currently used against the total number available. Unless the survey template is locked you can add questions to the survey, and remove those that you do not need. Individual questions may also be locked and cannot be removed.
Questions with a green tick icon
 are already included in the survey template, but you can remove them if
you do not wish to use them.
are already included in the survey template, but you can remove them if
you do not wish to use them.Questions with a grey lock icon
 are included in the survey and cannot be removed.
Questions with a blue + icon
 are
not currently included in the survey template, but you can add them if
you wish to use them.
are
not currently included in the survey template, but you can add them if
you wish to use them.To move a question to a different location in the survey (change the order in which the questions are presented to the respondent), grab the
 icon for the question and drag
it to the desired location.
icon for the question and drag
it to the desired location.To remove a question from the survey, click the
 icon. The question is moved to its
dimension in the "available" column, and given a
icon so you can replace it in the
survey later if required.
icon. The question is moved to its
dimension in the "available" column, and given a
icon so you can replace it in the
survey later if required.For each question in the "available" column, click the
 icon to open an information overlay
for that question. For each question in the survey, click Show
properties to open an information overlay for that question.
icon to open an information overlay
for that question. For each question in the survey, click Show
properties to open an information overlay for that question.
Once you have the required questions in the required order, click Next to move to the Select recipients page.
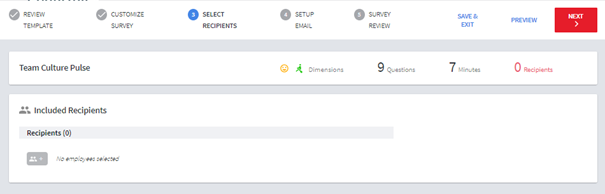
Figure 2 - Example of the Select recipients pageThe Pulse solution can be configured to offer users different ways of selecting who the survey should go to:
The solution can offer users the ability to filter by a configured set of demographic filters from the contact database, like for example the organization hierarchy, location, age, gender, tenure etc., potentially in combination with random sampling to select a particular percentage of the population matching the filter.
The solution can offer users the ability to select specific contacts (employees) from the contact datbase, by searching for them in the organization hierarchy.
The solution can offer users the ability to paste in email addresses of survey recipients (which will then automatically be added to the contact database, without background variables).
Here is an example where the user can choose specific contacts.
Click
 to open the
selection overlay.
to open the
selection overlay.This overlay displays the hierarchy and possible recipients.
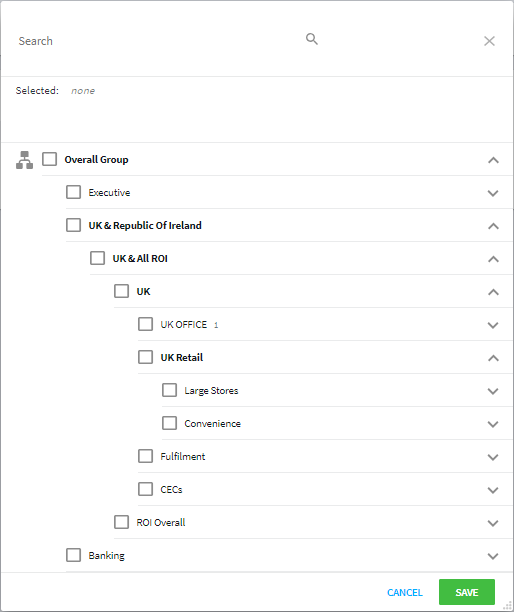
Figure 3 - Example of the selection overlaySelect the recipients to whom you wish to send the survey, then click Save.
The Select recipients page is updated to list all the selected recipients and show the total number selected.
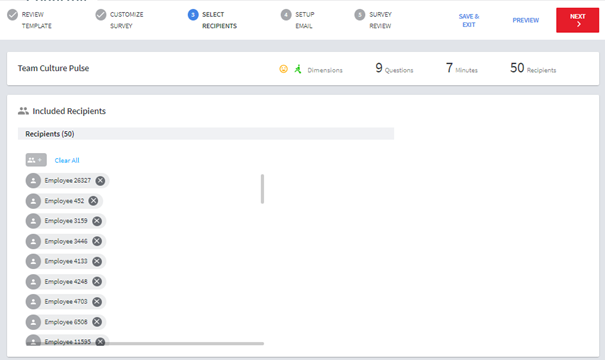
Figure 4 - The updated Select recipients pageWhen you are happy with the recipients, click Next to go to the Setup email page.
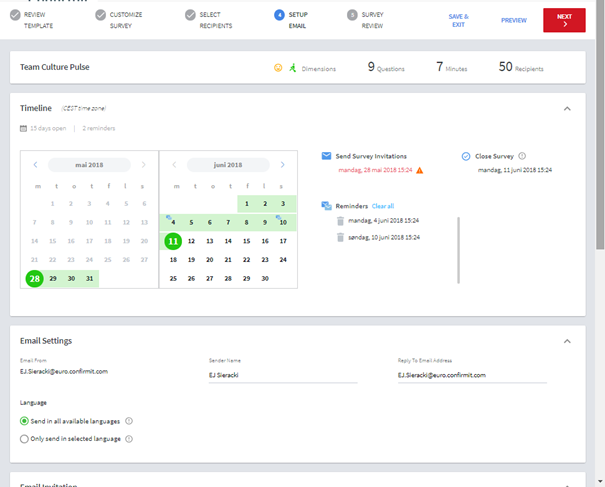
Figure 5 - The Setup email pageHere you set the date when the invitation and reminder emails are to be sent, and the date the survey is to be closed, You can edit the sender’s name and reply-to email address, and, if the emails are available in more than one language, specify which languages the emails are to be sent in. Note that you cannot change the texts of the emails here; these are set up in the survey itself. (Pulse Library Survey)
When you are happy with the email settings, click Next to go to the Survey Review page.
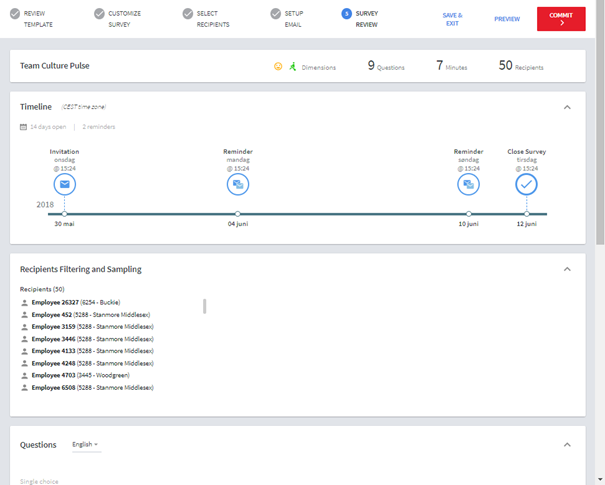
Figure 6 - Example of the Survey review pageThis page provides you with an overview of the survey. The information presented includes how many questions are used and which dimensions these are taken from, roughly how long a respondent should use to complete the survey, how many recipients will be sent the survey, the timeline for the survey, a list of all the recipients, and finally, the questions that will be asked.
Assuming you are satisfied with the survey as it is, click Commit to launch the survey it.
Invitation emails will then be sent to the selected recipients on the specified date, and reminder emails will be sent to those who have not replied to the survey by the specified date(s).
If the Pulse solution is configured to allow preview, you can click Preview at any point to see how the survey will look to the recipients.